Wound Care Photography: Clinical Documentation That Holds Up
Wound care photography best practices — camera angle, lighting, ruler placement, patient consent, HIPAA storage, and building a visual record for billing.
Damon Ebanks
Medipyxis
Wound Care Photography Best Practices: Clinical Documentation That Holds Up
A wound care photograph is a clinical document. When taken correctly, it provides objective evidence of wound status, healing trajectory, and treatment response that text descriptions cannot match. When taken poorly — wrong angle, no ruler, inconsistent lighting, no anatomical landmark — it is a picture that proves nothing and may actively undermine the clinical record.
Payers, auditors, and legal reviewers evaluate wound care photographs as part of the documentation package. A photograph that does not clearly demonstrate wound size, wound bed characteristics, and periwound status fails its purpose regardless of how accurately the clinician described the wound in the narrative note. This guide covers the technical and procedural standards for clinical wound photography that holds up under scrutiny.
Camera Angle and Distance
The Perpendicular Standard
Every clinical wound photograph should be taken perpendicular (90 degrees) to the wound surface. This is the single most important technical standard because it eliminates parallax distortion — the visual distortion that makes a wound appear larger or smaller depending on the camera angle.
Common errors:
- Oblique angles make the wound appear foreshortened, understating its true dimensions
- Too close without context makes it impossible to identify anatomical location
- Too far away without a close-up loses wound bed detail
The Two-Photo Minimum
At every visit, take at minimum:
- Orientation photograph: Wide enough to include anatomical landmarks that identify the wound location (e.g., medial malleolus, sacrum, plantar surface of the foot). This photo answers the question: "Where on the body is this wound?"
- Close-up photograph: Perpendicular to the wound surface, close enough to demonstrate wound bed tissue type, periwound skin condition, wound edges, and ruler placement. This photo answers the question: "What does this wound look like?"
For wounds with tunneling, undermining, or irregular geometry, additional photographs from different angles may be necessary to document the full extent.
Ruler and Measurement Reference
Always Include a Ruler
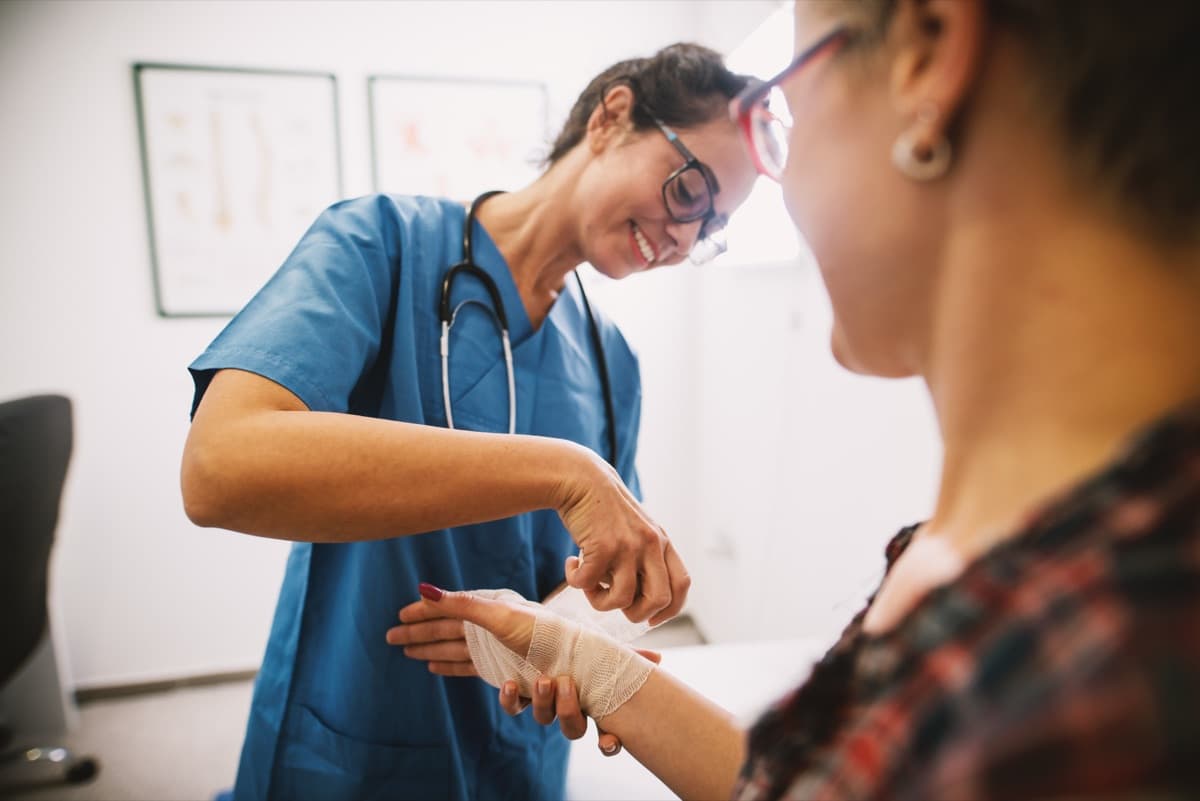
A photograph without a ruler is a photograph without scale. Include a disposable paper ruler or measurement strip in every close-up wound photograph, placed adjacent to the wound (not on top of the wound bed) at the level of the wound surface.
Placement guidelines:
- Position the ruler parallel to the longest axis of the wound, adjacent to the wound edge
- The ruler must be in the same focal plane as the wound — a ruler held above or below the wound surface introduces measurement error
- Ensure the ruler markings are legible in the photograph — centimeter markings should be clearly readable
- Disposable rulers prevent cross-contamination between patients
Measurement Documentation
Wound measurements documented in the narrative note should be consistent with what the photograph shows. A note stating "wound measures 3.2 cm x 2.1 cm" accompanied by a photograph where the wound clearly extends well beyond the visible ruler markings creates a documentation conflict. Take the measurement at the time of photography, with the ruler in place, to ensure consistency.
Lighting
Consistent Lighting Matters
Inconsistent lighting between visits makes it impossible to compare wound bed color, tissue type, and periwound changes. A wound bed that appears red and healthy under warm direct light may appear dusky under fluorescent overhead light.
Best practices:
- Use the same light source at each visit whenever possible
- Avoid direct flash, which washes out wound bed color and creates glare on moist surfaces. If using a smartphone, position a secondary light source (lamp, window light) at a 45-degree angle to the wound surface.
- Avoid shadows across the wound bed — particularly shadows cast by the clinician's own hands or the camera
- Consistent exposure settings: if using a dedicated camera, use the same white balance and exposure settings at each visit. If using a smartphone, avoid auto-HDR processing that alters color representation.
The Home Setting Challenge
Home health and mobile wound care clinicians cannot control the lighting environment. Rooms may be dim, bulb color temperatures vary, and window light changes with time of day and weather.
Practical solution: Carry a small clip-on LED ring light. These are inexpensive, attach to any smartphone, and provide consistent, diffused illumination of the wound bed regardless of ambient lighting. This single tool eliminates the most common lighting variability in mobile wound care photography.
Background and Patient Positioning
Clean Background
The area immediately surrounding the wound should be free of distracting elements — soiled linens, open supply packages, gloves, or personal items. A clean blue or white disposable drape behind the wound provides a consistent, clean background that improves photo quality and professionalism.
Consistent Positioning
When tracking wound progression over time, photograph the wound from the same angle and patient position at each visit. If the initial photograph was taken with the patient supine and the wound on the posterior calf, subsequent photographs should reproduce this position. Changes in patient position alter gravity effects on tissue, wound shape, and periwound appearance, confounding visual comparison.
Consent
Obtain and Document Consent
Wound care photographs are part of the medical record and are subject to the same consent requirements as any clinical documentation. Additionally, because photographs capture identifiable body features, specific photo consent is a best practice.
Consent elements:
- Verbal or written consent before the first photograph
- Document that consent was obtained in the clinical record
- Specify the purpose of the photographs (clinical documentation, medical record, treatment planning)
- Inform the patient that photographs will be stored in their medical record and are subject to the same privacy protections as all medical information
- If photographs will be used for any purpose beyond direct clinical care (education, publication, marketing), obtain separate written consent with a specific release form
Identifiability
Avoid including identifiable features (face, tattoos, distinctive birthmarks) in wound photographs unless necessary for anatomical context. When identifiable features must be included, the consent documentation is even more critical.
HIPAA-Compliant Storage
Where Wound Photos Can Live
Wound care photographs are protected health information (PHI). They must be stored in HIPAA-compliant systems with appropriate access controls.
Acceptable storage:
- Directly within the electronic health record (EHR) or wound care documentation platform, attached to the patient encounter
- A HIPAA-compliant cloud storage solution with encryption at rest and in transit, access logging, and role-based access control
- A dedicated clinical photography application that meets HIPAA security requirements and integrates with the EHR
Not acceptable:
- The clinician's personal smartphone camera roll (even temporarily)
- Personal cloud storage (iCloud, Google Photos, Dropbox personal accounts)
- Text messages or email
- Social media of any kind, even with "deidentified" images
The Smartphone Problem
Most wound care clinicians use their smartphones for wound photography because dedicated clinical cameras are expensive and impractical in the field. This is acceptable only when the workflow ensures photographs move from the device to the compliant system immediately and are deleted from the personal device.
Compliant smartphone workflow:
- Take the photograph using the clinical documentation application (not the native camera app) — most wound care EHRs and documentation platforms have integrated camera functions that store images directly in the patient record.
- If the native camera must be used, transfer the image to the compliant system immediately after the visit and delete the image from the camera roll and recently deleted folder.
- Device-level security: passcode lock, automatic screen lock, remote wipe capability, and encryption enabled.
Photography Frequency
When to Photograph
- Initial evaluation: Every wound at every anatomical location
- Every subsequent visit: At minimum, photograph the wound at each clinical encounter. Weekly photography is the standard for active wound care.
- Before and after debridement: Document wound bed appearance pre- and post-debridement to demonstrate the procedure performed
- When wound status changes significantly: New tissue type exposure, signs of infection, wound deterioration, tunneling or undermining development
- At wound closure: Final photograph documenting complete epithelialization
Serial Comparison
The true value of wound photography is longitudinal comparison — viewing the sequence of photographs over time to assess healing trajectory. Individual photographs are snapshots; the series tells the clinical story.
Organize photographs chronologically within the medical record so reviewers can see the progression. Date-stamped photographs aligned with corresponding narrative notes create a documentation package that is far stronger than either photographs or notes alone.
Common Mistakes That Undermine the Record
No ruler: The photograph has no scale reference. Wound size cannot be verified from the image.
Blurry images: A blurred photograph documents nothing. If the image is not sharp, retake it. Review the photograph before leaving the patient.
Inconsistent angles between visits: Comparing a photograph taken perpendicular to the wound with one taken at 45 degrees gives a false impression of size change.
Personal device storage without transfer: The photograph exists on a personal phone, not in the medical record. If the phone is lost, stolen, or replaced, the documentation is gone — and HIPAA has been violated.
No anatomical context: A close-up of a wound with no surrounding anatomy visible. Where is this wound? The photograph does not say.
Post-processing or filters: Adjusting brightness, contrast, saturation, or applying filters to wound photographs alters clinical data. Never apply image filters to clinical photographs. If the lighting was poor, note it and retake next visit — do not correct it digitally.
Key Takeaways
- Include a measurement reference (ruler or calibration marker) in every wound photograph -- photos without scale cannot support dimensional claims under audit
- Standardize photo capture: consistent lighting, perpendicular angle to wound surface, same distance across visits, and identifiable anatomical landmarks for wound location
- Capture wound photos through the EMR app, not the phone camera -- EMR-captured photos are linked to the patient record with metadata; camera roll photos require manual upload and lose chain-of-custody documentation
- Take at minimum three photos per wound per visit: overview showing anatomical location, close-up showing wound bed detail with measurement reference, and any notable features (undermining probe, periwound changes)
For details on CPT coding for wound photography and when photographic documentation supports medical necessity for specific procedures, see the photography coding FAQ. For broader Medicare documentation requirements that wound photographs support, see the documentation requirements guide.